Implementing Action Synchronization with Pass-Through States in Unity Mecanim
Recently, our company launched a casual mini-game, and I handled the animation part, developing a basic yet functional action synchronization solution in the project. It is based on broadcasting states for synchronization, and the principle is not complicated. However, what works best is what fits the needs—this solution is sufficient for most mini-games that are not sensitive to latency, and it can be quickly set up without relying on third-party plugins. Therefore, I would like to share the thought process behind building it.
Basic Introduction
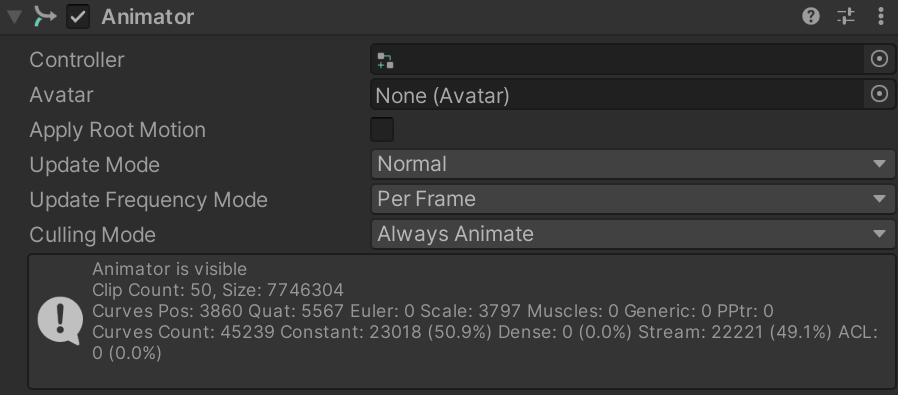
Unity’s built-in animation system is called Mecanim, which is a state machine-based animation system. Each Layer maintains an active State, which holds animation clips (motion), and the animation clips of the active state are played. Multiple Layers are stacked according to masks to achieve the final animation effect.
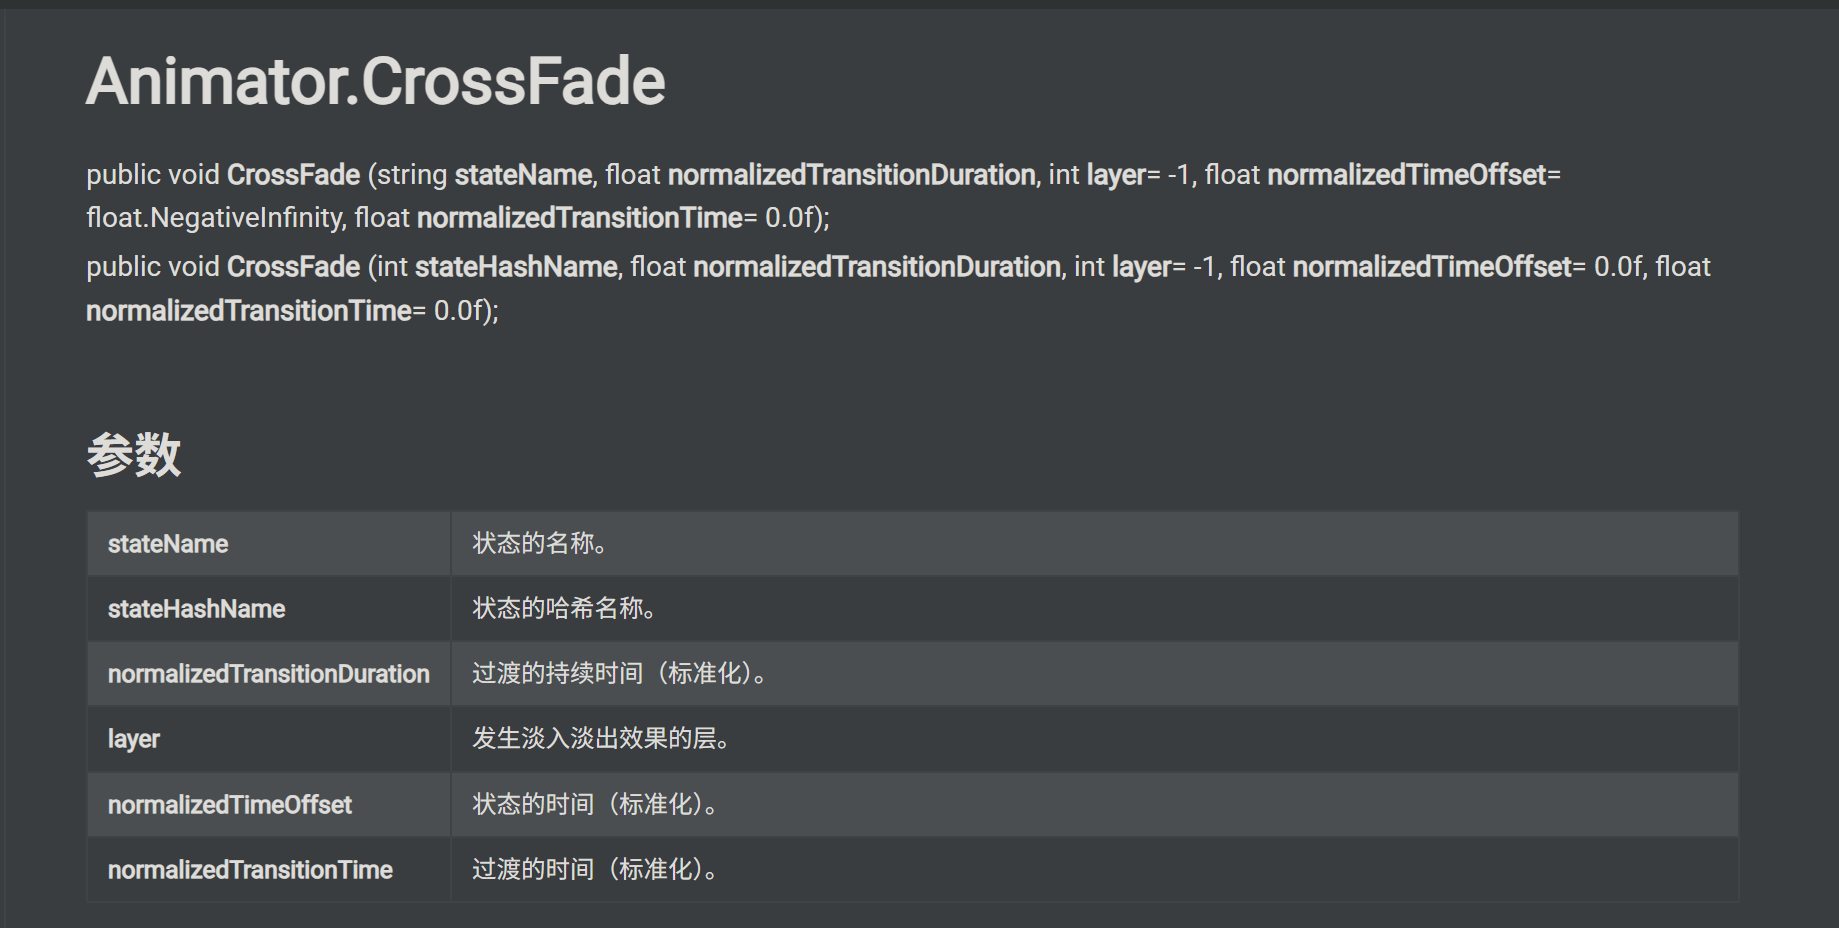
There are various ways to play an animation for a state: in addition to setting transition conditions in the AnimatorController for Unity to handle automatically, you can also use the CrossFade API to manually force playback:
Thus, a relatively straightforward solution is to synchronize the local animation state that is currently playing along with its related information, allowing other clients to receive this information and reproduce the action locally using CrossFade, thereby achieving basic animation synchronization.
However, the above is an ideal description; directly adopting this solution in practice can lead to many issues. Below, I will discuss the detailed design based on this synchronization solution and how to avoid these problems to make it truly usable.
Author’s Note:
The goal of this approach is to synchronize animation presentation, not to provide authoritative gameplay synchronization.
The receiving side does not participate in local state decision-making; it is only responsible for consuming the synchronized result.This makes it suitable for scenarios where the purpose is to let other players see what you are doing, but not for cases where animation timing directly determines gameplay outcomes.
For example, it works well for social emotes, item-holding visuals, and non-critical interaction animations.
However, it is not suitable to rely on this approach directly for things like attack hit detection, fighting game startup frames, or hit stun / stagger reactions.
Solution Details
Synchronize Parameters or State?
If multi-device synchronization is achieved through message forwarding, the most intuitive approach is to broadcast the local AnimatorController’s Parameters, and use the same AnimatorController across multiple devices, somewhat akin to frame synchronization, ensuring consistent results by maintaining input uniformity.
This approach itself isn’t problematic, but considering real-world network latency, directly broadcasting parameters becomes less viable—sending order != receiving order. For the same state machine, different sequences of parameter changes can lead to entirely different outcomes, causing the receiving end’s state to become inconsistent.
Of course, using a cache queue to ensure message order can avoid timing issues, but executing animation states in the Animator also takes time, making it difficult for the receiving end to determine when to fetch new data from the cache, which is quite cumbersome!

In contrast, under the premise of not pursuing strict temporal consistency, broadcasting State appears to be more reliable. Although timing issues still exist, since it is a result-to-result transmission, the “one misstep leads to another” situation seen with parameter broadcasting won’t occur. Additionally, the receiving end no longer needs to consider action execution time, as the sending end will relay the latest state that can be directly reached.
However, simply broadcasting state also has significant limitations. Mecanim’s State can hold more complex substructures (like an Idle-Move-Run blend tree based on speed values), which often require additional data (like speed values) to perform correctly.
Therefore, my approach is to broadcast both the StateNameHash and continuous parameters (such as the speed parameter controlling the Move-Run blend) to achieve basic synchronization. Note that not all parameters in the Animator need to be synchronized; I recommend operating as follows:
| Type | Recommended to Sync | Example |
|---|---|---|
| Continuous parameters driving behavior | Recommended | Speed, direction, aim pitch, upper body weight |
| Discrete parameters used only for local decisions | Usually not to sync directly | Trigger, combo index, local bool |
| Context parameters affecting state interpretation | Sync as needed | Weapon type, posture type, vehicle type |
Below is a reference for a data structure using the Protobuf protocol:
1 | [] |
[^Note:]: The CrossFade API requires a target state to include at least the state (StateNameHash) and layer (AnimLayer), so both must be included in the broadcast data.
You will notice that the State information sent in the broadcast is divided into three parts. In addition to the current Playing state’s StateNameHash, it also includes the NextStateNameHash for the next state and the StateNormalizedTime for the time already played in the current state. These additional parameters are not mandatory; they are intended to optimize performance and reduce latency, and they relate to Unity Mecanim’s transition mechanism. For detailed explanations, please refer to here.
Sending Local Player Data
Having determined the data to synchronize, we also need to consider the timing for sending the data synchronization. As the project expands, the parameters and states in the AnimatorController will gradually increase, and clearly, we cannot broadcast all states every frame, as this would lead to significant bandwidth consumption.
To make synchronization more precise, I am using a container caching + next frame forwarding approach, as illustrated in the following code:
1 | // Sync容器 |
You can see that the code implements multiple processes. By default, the system will not transmit any data. Only when the m_ThisFrameSyncRequestLayers cache contains data will the animation data for the corresponding layers be sent in the next frame. Whenever a player performs an action (such as using an item), simply call the function shown below to update the cache, and the synchronization system will handle it automatically.
1 | /// <summary> |
[^Note]: The reason for sending data in the next frame is to wait for the Animator’s state update.
We have eliminated most scenarios; in fact, we can further cache the forwarded state to prevent continuously broadcasting the same state.
Receiving Player Data Synchronization
The receiving end’s processing logic needs to address two main issues: asynchronous initialization and state consistency checks.
Since the timing of network messages may arrive before the player entity’s initialization is complete, the receiving end cannot immediately apply the animation data. The system uses an asynchronous waiting mechanism to process the data only after the target player’s AnimatorController component is ready.
Once the Animator is ready, we do two things:
- First, we set the continuous parameters of the Animator (such as speed parameters), which are crucial for states that require continuous value control, like blend trees.
- Next is the state consistency check: the system compares the local current state and the next state with the state hash in the broadcast data. If they match exactly, it skips the update to avoid unnecessary animation replay, which can significantly reduce the overhead of repeated synchronization in stable states.
Here is a reference for the basic version of the code:
1 | public void PlayFromBroadcast(BroadcastAnimUpdateData broadcastData) |
至此, 我们打通了从发送到接收的大致流程.
Puppet Receiver
I don’t know if you’ve actually followed the above approach and tried it out, but if you did, you would realize that directly applying your AnimatorController to the Player on the receiving end (other players) doesn’t work. Upon closer inspection, you’ll find that the state changes of the Animator on the sending end (i.e., your player) depend on external settings of the Animator Parameters, while the receiving end does not synchronize these Parameters, making it easy for a transition condition to be unexpectedly met and switch the local state.
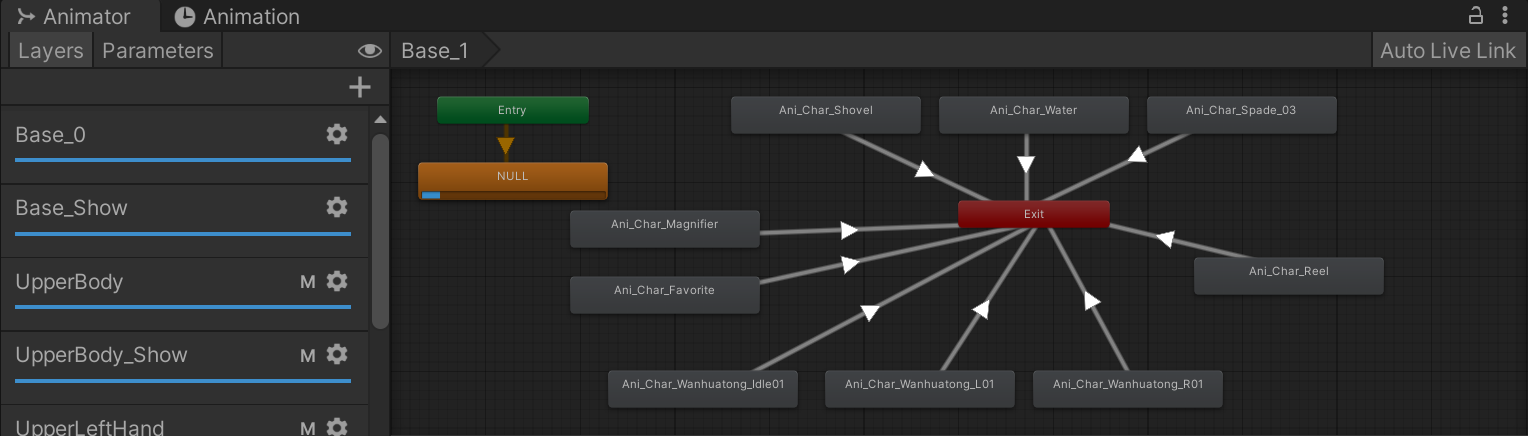
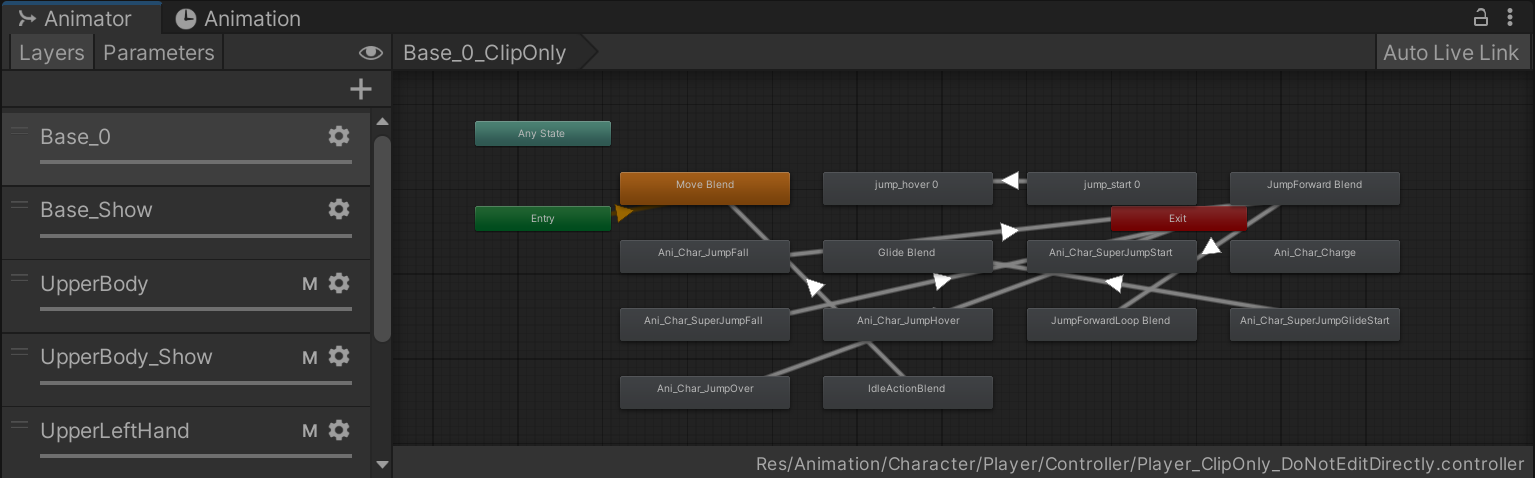
One way to solve this problem is to generate a copy of the state machine that is identical in state but cancels all transitions; I call this the Puppet (ClipOnly) state machine:
For comparison, the following image shows the original version of the state machine from the previous image (local execution version):
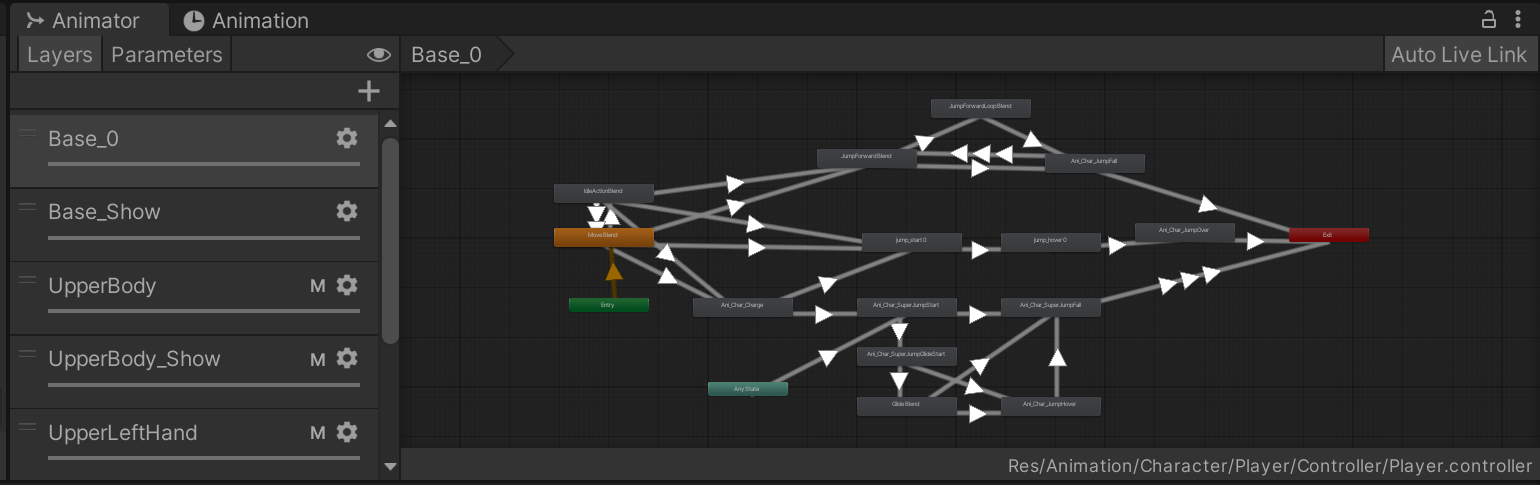
Applying the ClipOnly state machine to other clients (locally synchronized) while using the full state machine with transitions for your controlled player allows the local player to execute the complete action logic, while the other clients (i.e., the receiving end) effectively become puppets: they only play specific action states based on the received data and do not have the ability to switch states themselves.
| Role | Controller | Responsibility |
|---|---|---|
| Local Authority Player | Full Controller | Responds to input, makes full state decisions |
| Remote Performance Puppet | Puppet / ClipOnly Controller | Only consumes synchronized results, does not make decisions |
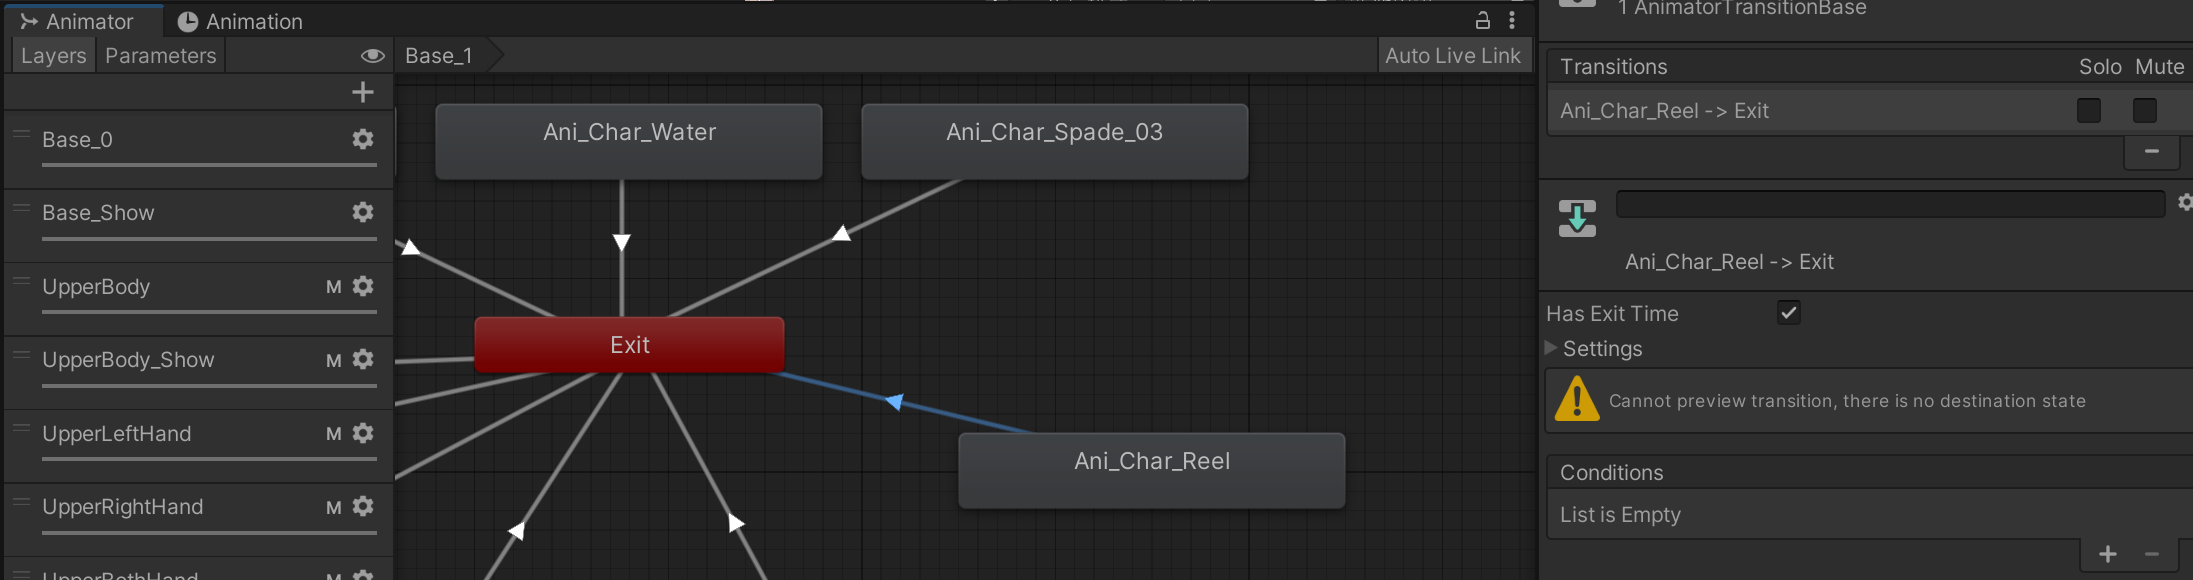
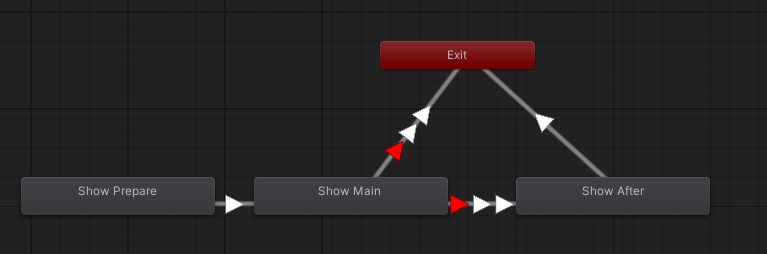
Observant readers may notice that the screenshot of the ClipOnly state machine I posted above does not actually cancel all transitions. In fact, I have retained some transitions that meet specific conditions to the puppet state machine; let’s take a look at two of them:
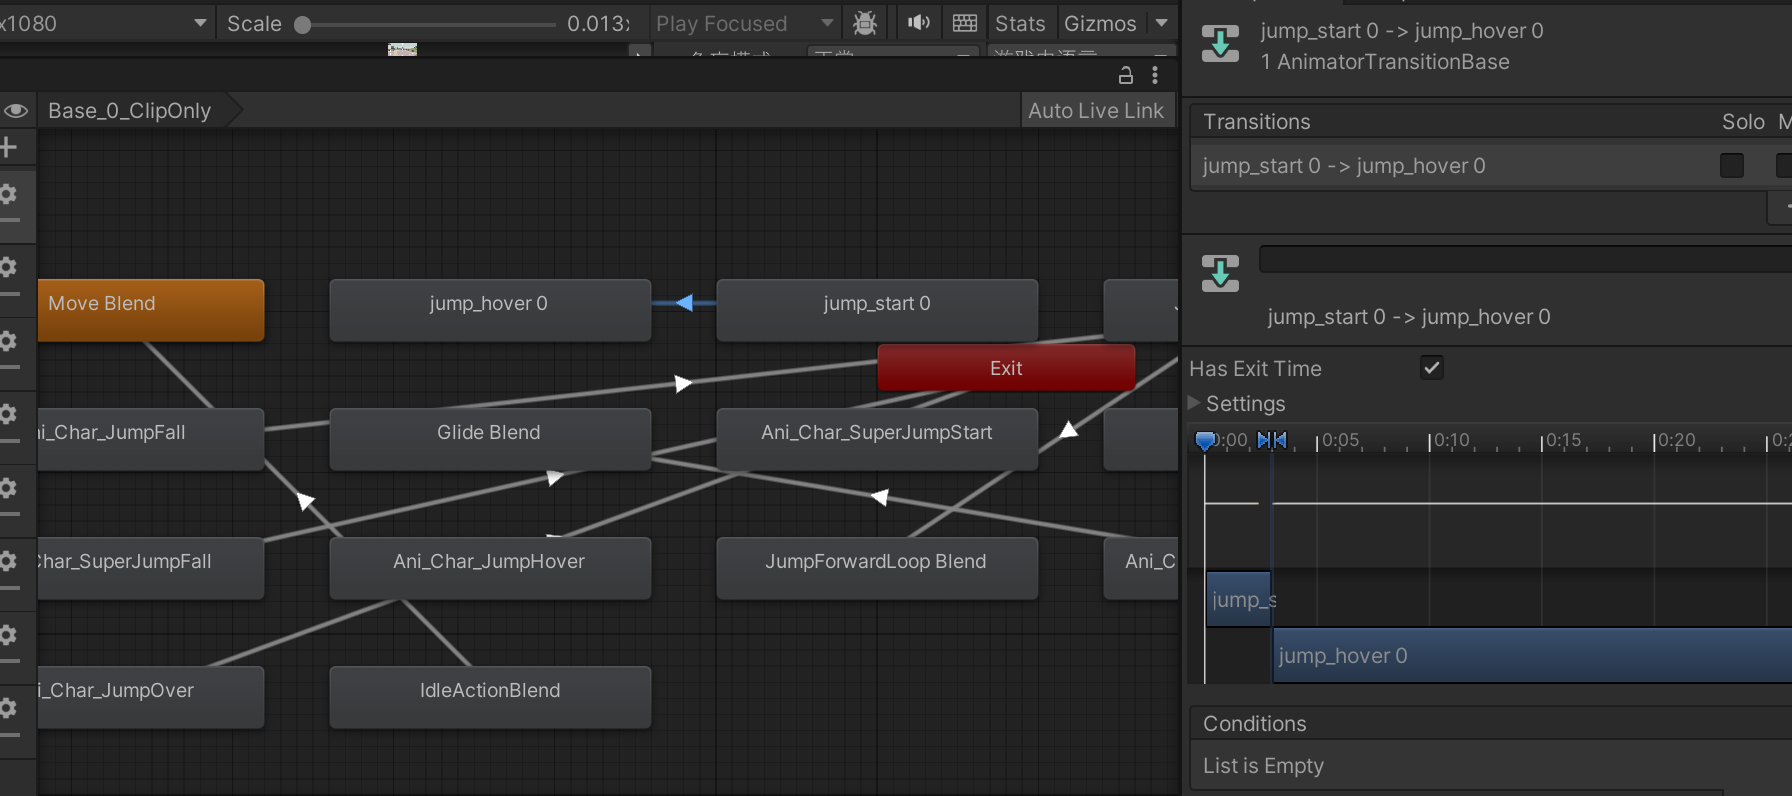
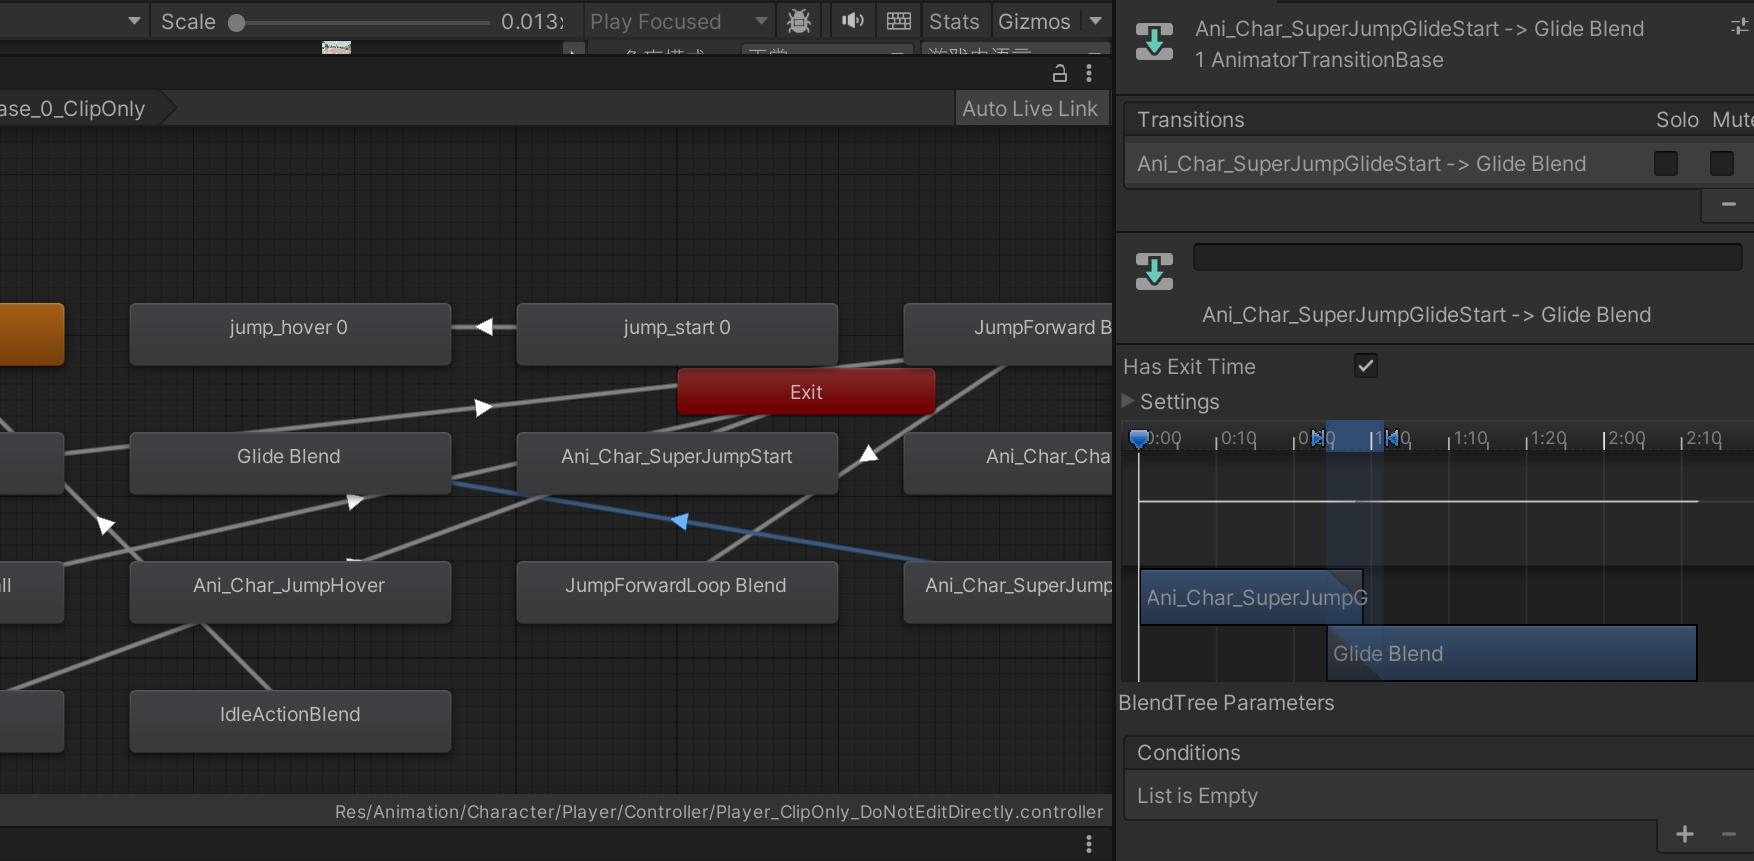
These transferred transitions all have only HasExitTime as a transition condition, meaning they can be executed unconditionally on the local end. Since this is the case, retaining these transitions in the puppet state machine allows it to handle these transitions at the right moment, reducing performance delays.
Additionally, we can also handle scenarios where transitions in the local state machine lead to the Exit state in this way. The transitions shown in the image above are typical “one-time” actions, with common examples being greetings or using items—actions that only need to be played once before exiting. Retaining these automatic exit transitions on the puppet state machine ensures that these one-time states can also exit correctly on the receiving end.
I have uploaded the tool for generating the puppet AnimatorController from the template AnimatorController in the Appendix section at the end of the article, so interested readers can take a look.
Data Persistence
So far, all the network transmission methods we’ve discussed are based on broadcasting. Generally speaking, the server does not persistently store information during this simple pass-through process. This raises a question: How do we persist data? Or more specifically, how does a newly joined player obtain the current state of other players?
My solution is to actively push the complete state: When a new player joins, existing players will actively send the complete animation state information to the new player. The system triggers a full synchronization by listening for player join events. When a new player joins the room, all existing players will be notified and begin pushing their states to the new player.
1 | // 推送所有目前已发生的Override |
完整同步包括两个部分:
- Animation States of All Layers:
The system traverses all animation layers to retrieve the current playback status of each layer, including state hash, normalized time, next state hash, and other information, which is then broadcasted to new players. - All Overridden Animation Clips:
Since the system supports multi-clip state synchronization, new players also need to obtain information on all overridden clips. The system traverses all cached override information and broadcasts it to new players one by one.
Data persistence is an inherent flaw of the broadcasting mechanism, but by actively pushing the complete state, we can provide basic synchronization support for new players without changing the server architecture. Although this approach has some drawbacks, it is sufficient for small-scale multiplayer games and casual games.
If the project needs to support larger-scale multiplayer scenarios or has higher real-time synchronization requirements, it is advisable to consider introducing a server snapshot mechanism or other persistence solutions.
Advanced Features
The above design was established in the early stages of the project and can accommodate most basic functionalities. However, as the project iterates, this synchronization mechanism also requires some functional expansions to meet new business needs. Here’s a summary for those who wish to use this solution.
Pre-Performance
Network latency is the main challenge faced by action synchronization systems. If the receiving end always waits for the sending end’s state changes before playing the animation, players will noticeably feel the stutter caused by the delay.
Let’s briefly review Unity Mecanim’s animation transition mechanism: When a transition state is available, Unity first schedules that state as NextState, then executes the transition. Once the transition is complete, the NextState becomes the new CurrentState, thus completing a transition.
Moreover, Unity provides an API to retrieve the “transitioning state,” meaning we can know this information just before a state is about to play and send it out in advance.
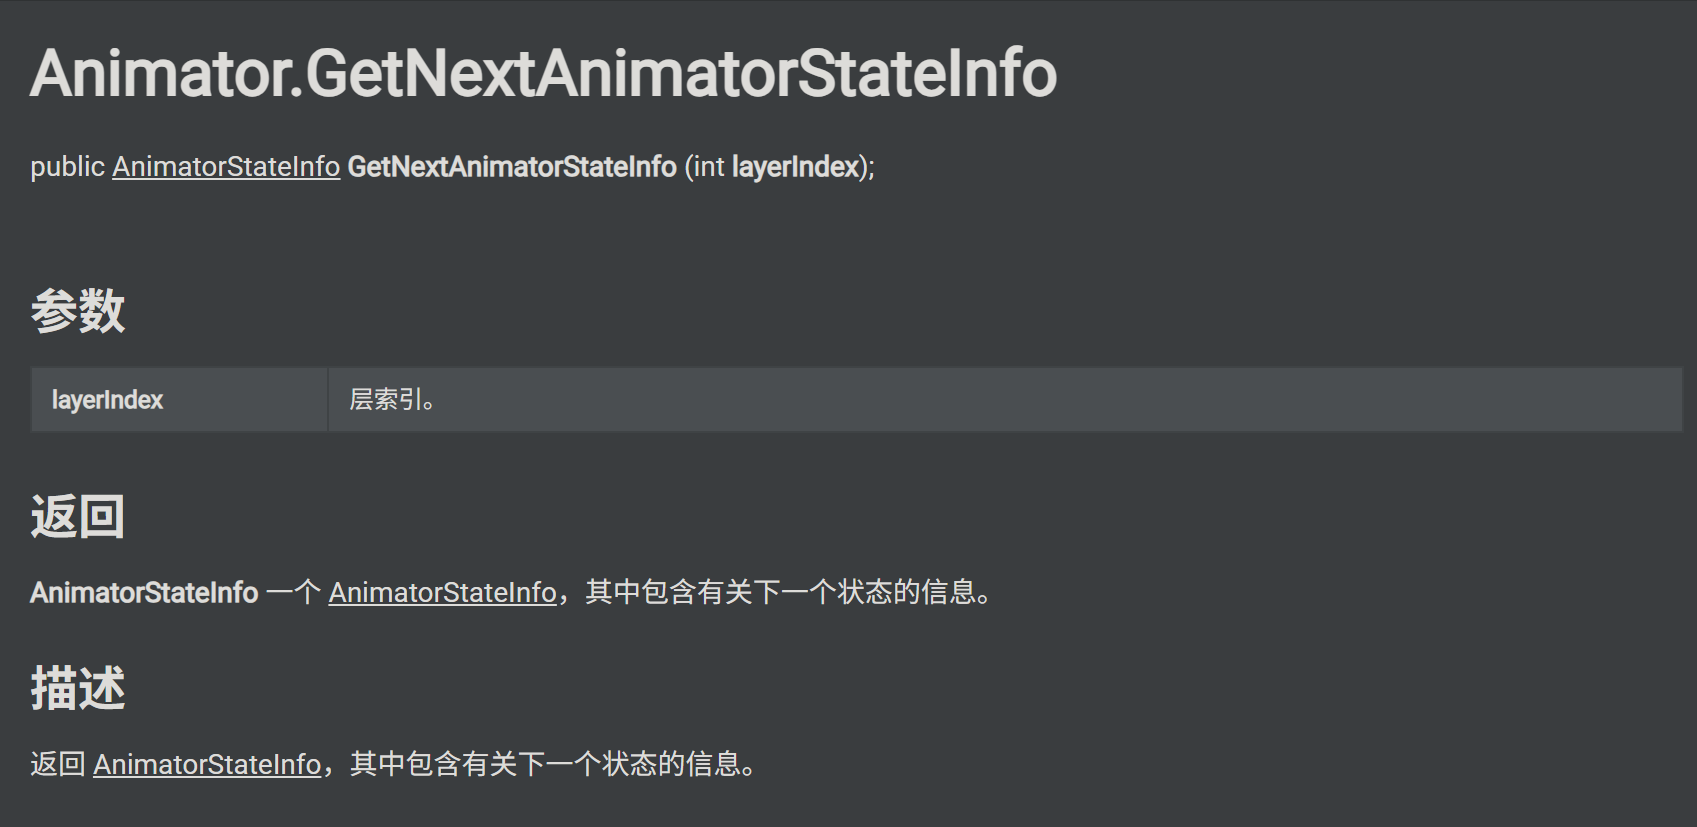
Based on this time difference, we can implement a simple pre-performance feature. The core idea is: when the sending end detects that the state machine is about to transition, it sends the information of the next state in advance, allowing the receiving end to start the transition animation early, thereby reducing visual latency.
On the sending end, we can use Unity Mecanim’s GetNextAnimatorStateInfo API to check if the current layer is transitioning to the next state. If a transition is detected (the returned state hash is not 0), it should be included in the broadcast data. This detection occurs one frame before the delay in sending, ensuring that the impending state change is captured:
1 | public void SendBroadcastAnimation(DefAnimatorController_Player.Layers layer) |
In the receiver, when broadcast data containing NextStateNameHash is received, the system will immediately use CrossFade to transition to the next state, rather than waiting for the current state to finish playing. This way, even if there is network latency, the receiver can start the transition animation simultaneously (or even earlier) with the sender’s state change. You can compare the logic below with the differences in the basic version:
1 | public void PlayFromBroadcast(BroadcastAnimUpdateData broadcastData) |
Polymorphism of States
In practical projects, it is common to encounter the need for the same animation state to play different animation clips based on different contexts. For example, when a player holds different items, the “grip” state should play different animations; or when different characters use the same state machine, certain states need to play character-specific animations.
Unity provides the AnimatorOverrideController to address this issue. It allows for dynamic replacement of the animation clip corresponding to a specific state in the base AnimatorController at runtime, without modifying the structure of the state machine. Our synchronization system is also based on this to achieve multi-clip state synchronization.

To accomplish this, you first need to replace the runtimeAnimatorController of the Animator with a new AnimatorOverrideController generated based on the current Animator template, thereby granting the Animator the ability to dynamically replace clips. This can be easily done using the API provided by Unity:
1 | // 基于当前模板创建新的 AnimatorOverrideController |
The image below shows an Animator component with the runtimeAnimatorController field replaced. You can see that the name of the Controller field has been removed, indicating that the original AnimatorController resource is no longer in use.
After replacing the runtimeAnimatorController, we can easily swap one original Clip for another:
1 | m_OverrideController[clipNameInBaseController] = clip; |
Note that the clipNameInBaseController used here for indexing refers to the Clip name, not the State name. Therefore, to override in this manner, ensure that the state you want to override already holds an animation clip, and then use the name of that clip for indexing.
Some states may not even hold a default motion. In my project, I’ve prepared some empty animation clips specifically for assigning values to them for subsequent indexing:
The system’s design follows the principle of “override equals sync”: when a Clip is overridden on the local side, it automatically triggers a sync broadcast, allowing other clients to apply the same override upon receipt. This ensures consistency in the multi-end state machine structure while allowing for differentiated animation performance in different contexts.
On the local side, simply asynchronously load the specified animation resources, and then set them in the AnimatorOverrideController. For performance considerations, the system should cache loaded animation resources to avoid redundant loading. Below is a snippet of code for reference:
1 | /// <summary> |
After implementing local Clip overrides, forwarding this operation will allow the receiving end to execute the same action, achieving synchronized state replacement. Once both State and Motion are kept in sync, the overall animation will also be synchronized. Observant readers will notice that the function provided above is marked as protected virtual. In my project, OverrideAnimationClip is a logic reused by both the sending player and the receiving player (which I believe is the right approach).
The specific logic is that when the local end successfully overrides the Clip, it will automatically trigger a synchronization broadcast. The receiving end processes the override broadcast through a dedicated Handler and applies the same override.
1 | // 发送玩家class中按如下方式重写 |
1 | // 接收端玩家中触发覆盖的接口 |
It should be noted that after overriding a Clip, the current state must be played again for the new Clip to take effect. This is because AnimatorOverrideController applies overrides at the state machine level, and a state that is already playing will not update automatically. Therefore, after applying the override, the receiving side immediately replays the current state using CrossFade. This handling also resolves the timing issue between OverrideAnimationClip and StateUpdate — regardless of whether OverrideAnimationClip arrives before or after StateUpdate, the correct animation will always be played at least once.
This mechanism has several typical application scenarios in the project:
Item Grasp Animation: When players pick up different items, the same “grasp” state will play the corresponding grasp animation for each item.
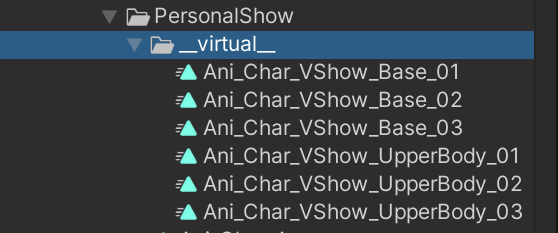
Personal Show Animation: The personal show system uses this mechanism to play different action animations. The same “personal show” state can play different animation clips based on configuration, including pre-action, main action, and post-action animations, with each part configurable and synchronized independently.
Movement Blend Tree: In some cases, it is necessary to replace Idle, Walk, and Run animations in the movement blend tree, for example, when a character changes outfits and needs to play new movement animations.
And the great thing is, for the same State interface (let’s consider multiple motion implementations of the same State as an interface-implementation relationship), you don’t need to write extra code to handle their replacements.
Summary
This code has been running online for a few months, and the basic functionality meets expectations. Currently, there aren’t many bug reports related to action synchronization (though this might also be due to the project’s relatively low DAU, meaning some hidden issues have yet to surface). Here, I’ll summarize the pros and cons based on my understanding.
This animation synchronization solution embodies a pragmatic design philosophy: it does not pursue perfect synchronization effects but instead quickly meets project needs through simple implementations and tool support while ensuring basic usability. For suitable scenarios, this solution can provide usable synchronization effects at a relatively low cost. For unsuitable scenarios, this article may not be your audience, and you may need to consider more complex synchronization solutions, such as state synchronization or frame synchronization.
Most importantly, when choosing a synchronization solution, it is essential to consider the actual needs of the project, the technical capabilities of the team, development time, and other factors comprehensively. There is no perfect solution, only the most suitable one.
If your project meets the following criteria, this solution is worth considering:
- Few players in the room;
- Animations primarily serve expression rather than judgment;
- You do not want to introduce complex server state management for animation synchronization;
- The team prefers “a small amount of error + quick implementation” over “strict consistency + high implementation cost.”
Conversely, if animations are tightly coupled with gameplay judgment, or if the project demands high real-time performance, fairness, and fidelity, this solution should not be the primary option.
Advantages
Simple implementation, quick setup
The core idea of this solution is very intuitive: the sender broadcasts the currently playing state, and the receiver reproduces it via CrossFade. There is no need for complex frame synchronization mechanisms, no need for state rollbacks and predictions, and no reliance on third-party network synchronization plugins. For developers with some Unity experience, a basic implementation can be completed within a few days.
Almost no server support required
Since almost all information is achieved through forwarding, the server only needs to provide the most basic (and universal) passthrough protocol, without needing to record or maintain state. If you only want to develop simple online mini-games, this can significantly save your server development costs.
Complete toolchain, low maintenance cost
Through two editor tools (Clip-Only generation tool and code generation tool), we have implemented a complete toolchain from state machine design to code usage. Modifications to the state machine can be quickly synchronized to the code and Clip-Only version, reducing maintenance costs.
Good horizontal scalability within the framework’s capabilities
The system supports multi-Clip state synchronization. Through the
AnimatorOverrideControllermechanism, it can flexibly configure different animation performances for different contexts while maintaining the state machine structure. This design meets the need for diverse expressions while keeping the state machine logic simple.
Disadvantages
Not suitable for delay-sensitive scenarios
The core issue of this solution is that delay is unavoidable. Even with pre-performance mechanisms, network delays will still cause the receiver to see state changes later than the sender. For scenarios requiring precise synchronization (such as competitive games or fighting games), this delay may be unacceptable, necessitating additional compensation measures.
While state synchronization avoids cumulative errors in parameter synchronization, each state change must wait for network transmission, making delays more apparent in high-latency environments (such as cross-region online play).
Network jitter affects performance
When network jitter or packet loss occurs, the receiver may experience animation “jumps” or “stutters.” Although you can set up timeout protection mechanisms, you cannot completely eliminate the impact of network issues.
Insufficient time synchronization accuracy
For looping animations (such as Idle and Walk), this issue is not significant. However, for one-time animations (such as attacks or skills), it may result in the receiver seeing animation progress that is inconsistent with the sender.
Appendix
Here are two practical Unity Editor tools that are often used in the action synchronization solution mentioned in this article. You can click their corresponding URLs to download them.